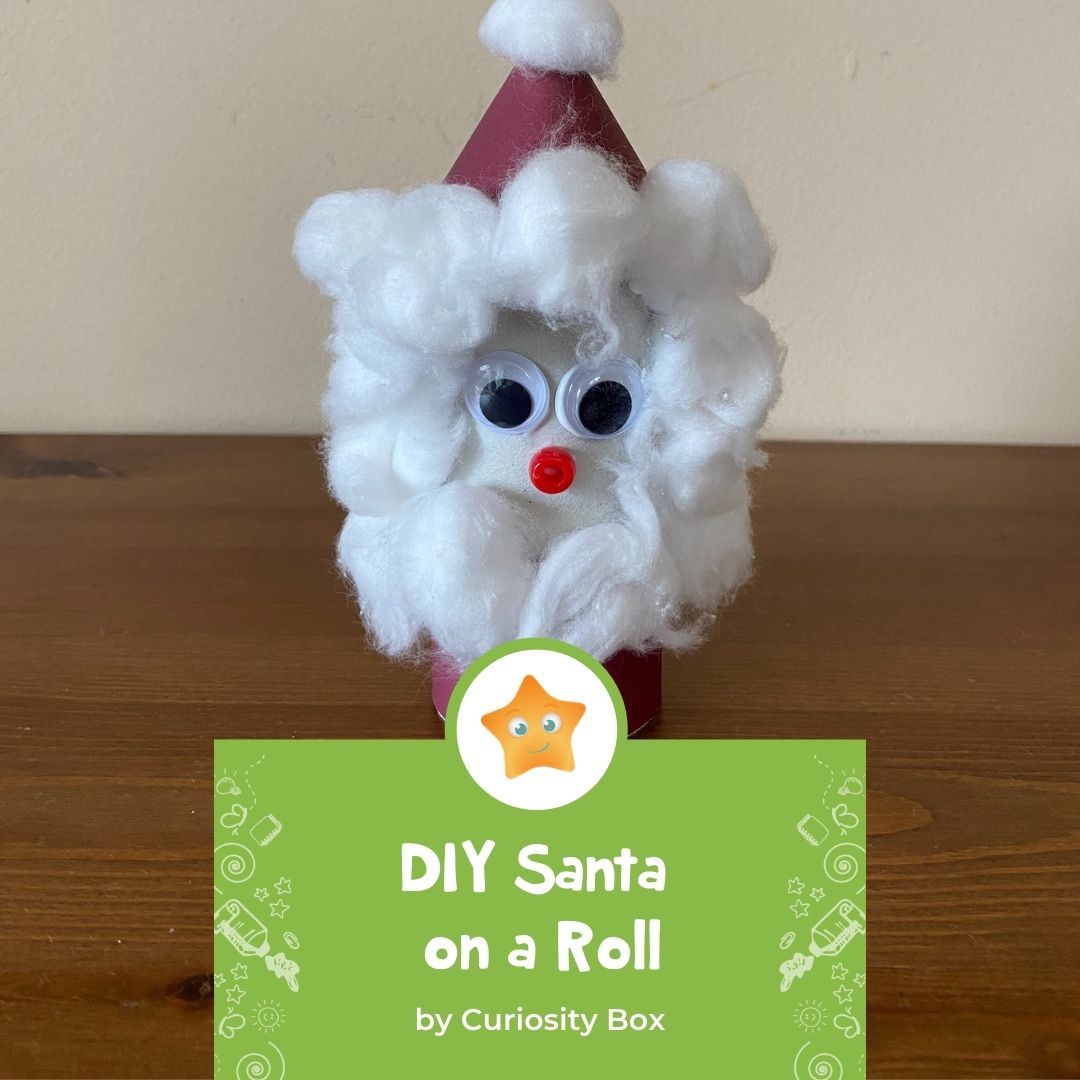
DIY Santa on a Roll
It’s almost Christmas time, and what is more fun than grabbing your kids and making a craft together. Today we are making “Santa on a Roll”. Read more to find out how to make your own!
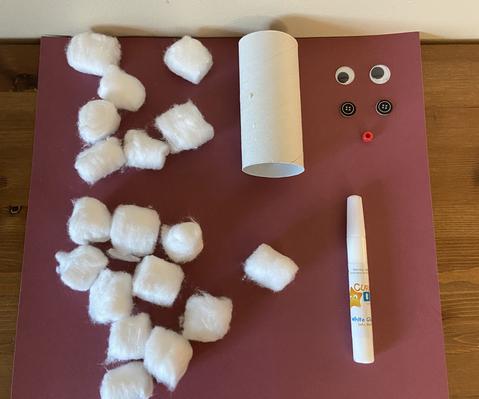
Materials
-toilet paper roll
-cotton balls
-glue
-2 googly eyes
-bead or pom-pom, red for the nose
-button (optional)
-red paper
-scissors
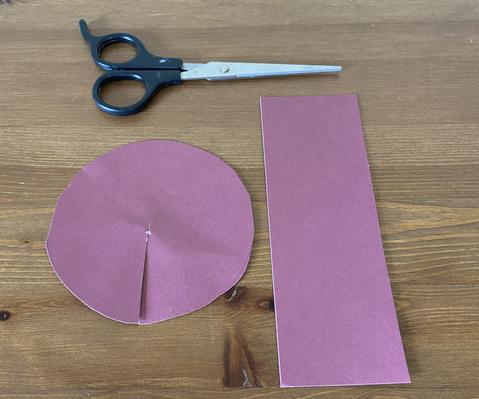
Step 1:
First, start by grabbing your red paper and cut out a rectangle large enough to fit around the bottom half of your toilet paper roll. Also cut out a circle and cut half of the circle stopping in the middle.
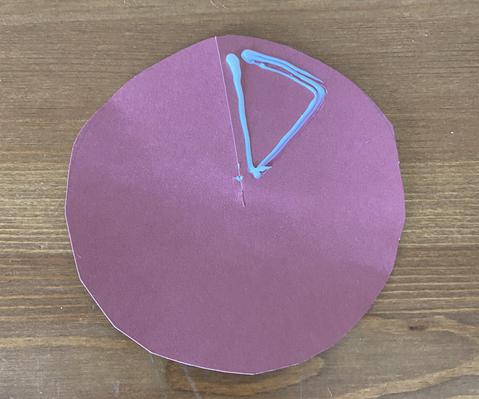
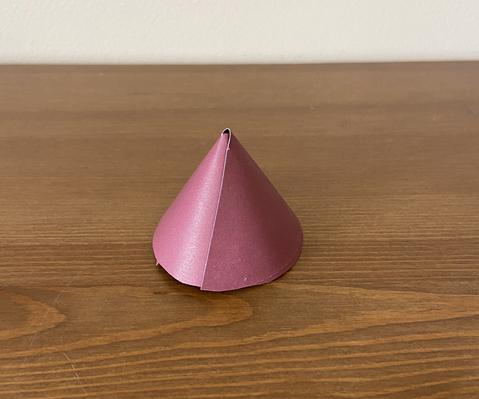
Step 2:
Secondly, put glue on a quarter of the circle and glue it onto the side of the circle creating a cone.

Step 3:
Next, glue the rectangle piece of red paper onto the bottom half of your toilet paper roll.
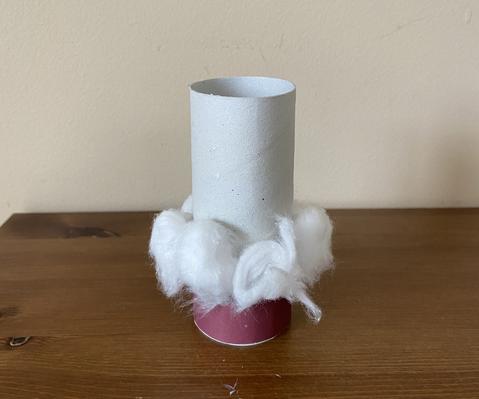
Step 4:
Then glue cotton balls around the top of the red rectangle piece of paper.
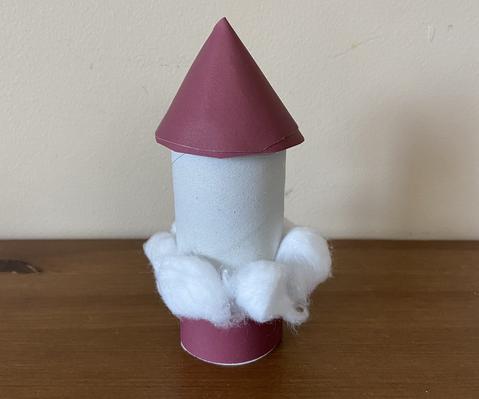
Step 5:
Next, glue on the cone on the top of the toilet paper roll.
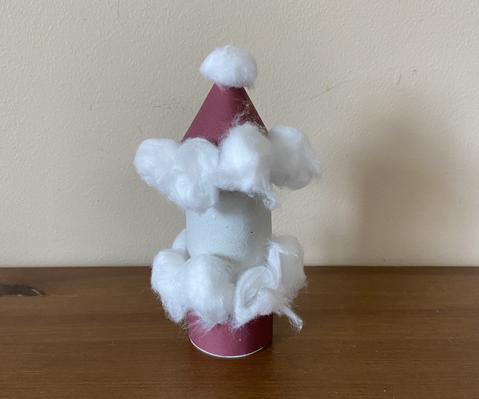

Step 6:
Glue cotton balls onto the top of the cone, around the cone and, making a square shape with cottons balls around the toilet paper roll.

Step 7:
Lastly, glue on the eyes, nose or a button onto the roll.
I hope you had fun making Santa on a Roll. Feel free to add anything to decorate Santa with. Maybe consider adding a belt, scarf and more. Happy crafting!